Attention! In order to get L2TP/IPSec working correctly with Windows, it is necessary to make changes to the registry (add a parameter). This problem is listed on the official Microsoft website https://support.microsoft.com/en-us/kb/926179. This procedure will be described below in (1) of this manual. If you are not ready to make changes to the Windows registry, then you can set up VPN with PPTP protocol (see PPTP settings), which not required the modification of the registry.
1. Making changes to the Windows registry (Administrative rights):
1) Run regedit with administrative privileges and locate the section HKEY_LOCAL_MACHINE\SYSTEM\CurrentControlSet\Services\PolicyAgent
2) Create DWORD (32 bit) parameter AssumeUDPEncapsulationContextOnSendRule and set value 2 for it.

3). Restart Windows!!!
2. After registry has been modified and computer was restarted, we can start to configure L2TP/IPSec connection. Click "Start" button and select "Settings" icon:

3. Click "Network & Internet":

4. Click "VPN":

5. Click "Add a VPN connection":

6. On the next page:
* in the list "VPN provider" select "Windows (built-in)"
* in the "Connection name" field, enter the name of the connection, for example, "VPN-SMART"
* in the field "Server name or address" enter given ip-address of your VPN server
* in the list "VPN type" select "L2TP/IPSec with pre-shared key"
* in the field "Pre-shared key" enter given IPSec pre-shared key
* in the list "Type of sign-in info" select "User name and password"
* in fields "User name (optional)" and "Password (optional)" enter given VPN user name (e-mail) and VPN password
* Check "Remember my sign-in info" checkbox and click "Save" button:

7. At this stage, a newly created connection VPN-SMART is ready, but network adapter is not yet configured. Do not connect now, please click "Change adapter options":

8. In context menu of a newly created connection VPN-SMART click "Properties":

9. Check again the given ip-address of your VPN Server on "General" tab:

10. Go to "Security" tab. Set Type of VPN as "Layer 2 Tunneling Protocol with IPsec (L2TP/IPSec)" and Data encryption as "Require encryption (disconnect if server declines)". Then check "Microsoft CHAP version 2 (MS-CHAP v2)" checkbox and click "ОК". Also close the previous "Network Connections" window:

11. Now everything is ready. You can connect to VPN server. To get connected please click "Connect" button in the window "Settings->Network & Internet". If buttons Connect, Advanced Options and Remove are not visible then click "VPN-SMART" to display them:

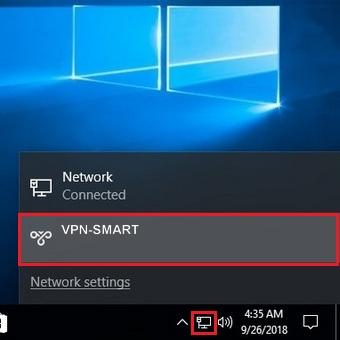
From now, after VPN-connection has already been created, it can be turned on/off from "Network" icon:

